
XPAG Gearbox Re-assembly & fitting.
Part One
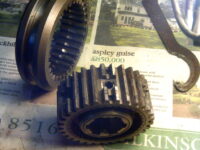
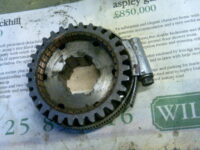
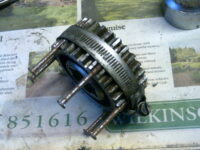
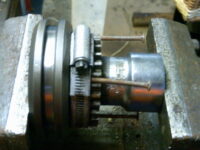
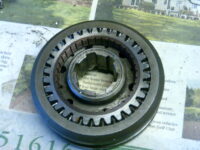
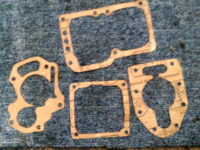
By now you should have all the machined faces of the various bits of the gearbox castings cleaned and a set of gasket either made or purchased. The inspection and assembly of the third-motion shaft is explained in the workshop manual on page E6 and E7. If your first gear (item 41) was damaged you will have obtained a new/good second hand one to fit. Now both the sliding-hub selectors, ‘1st & 2nd’, and ‘3rd & 4th‘, are moved by the relevant forks; they slide along the splined shaft and are locked by spring-loaded ball bearing. The actual 2nd & 3rd gears themselves rotate freely on roller bearings, being ‘locked’ to the shaft only when ‘selected’. Now assembling these synchromesh cone-selectors is a nightmare as you need six fingers to hold those 1/4” ball bearing into their holes. So I devised an easier method, first by using the selector from my ‘scrap-spares’ gearbox. The photos show how I held the balls in with a big Jubilee clip and 2” wire nails so the two halves could be gently ‘wound’ together in a vice. This works on both item 27 and 42.
 |
 |
 |
 |
 |
 |
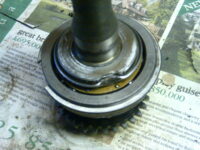
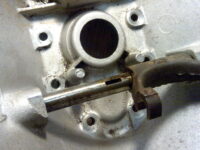
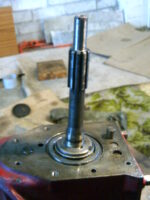
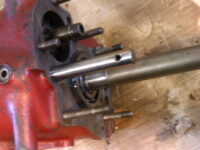
The next bit to assemble is the new bearing and its locking washer onto the first motion shaft (items 13 and 12. A ‘C’ spanner is required to undo this nut (item 16) and it is a LEFT HAND THREAD. Note the position of any washers for re-assembly. I held the splines in my vice with some aluminum jaw protectors to save damaging the shaft. Note in the photo how the locking washer ‘locks’ the nut. Then the clutch release bearing shaft can be refitted to the bell housing, in my case I use the shaft from my ‘spare’ gearbox as it was less worn that the original. Often grit will get embedded into soft brass/bronze bushes and chew away the harder steel shaft; once cleaned up and oiled the spare shaft was a decent fit. Remember to fit the key to the fork and the taper pin to lock it in place.
 |
 |
 |
 |
 |
 |
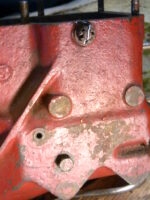
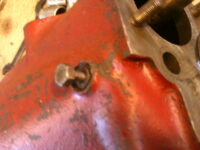
Now it is time to assemble the gearbox itself. Fit the reverse gear idler wheel on its shaft and the selector arm to the inside of the ‘box. The selector pivot nut has to be split-pinned and the shaft has a small locating bolt that screws in from the outside (like many of the other shafts do).
Part two.
Re-assembling the gearbox is the reverse of stripping, as the Haynes manuals use to say!! But it is true, (**apart from two really dodgy areas,) putting the gearbox back together is easy as long as you do it all in the correct order. As you fit items put some oil on it, do not assemble it ‘dry’.
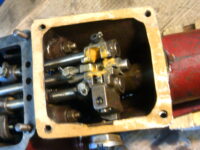
Once the reverse gear idler is re-fitted, you can drop the lay-shaft into the bottom of the gearbox. Using very thick grease put the roller bearings inside the shaft before you fit it. The grease will hold them in position. Take care to ensure the thrust washer tabs locate in the slots each end. Double check you only have about 3-5 thou end-play ( 0.003” to 0.005”), if there is more you need thicker brass thrust washers. You cannot fit the lay-shafts shaft yet, as the gear teeth get in the way of fitting the first motion shaft. Leave the lay-shaft lying in the bottom for now.
 |
 |
 |
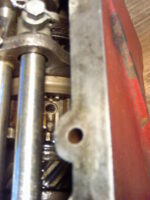
Now you can drop in the whole third-motion shaft (called the ‘mainshaft’ in the manual) from the top inside the gearbox casting, the reverse of how you took it out, so that the long shaft pokes out of the back. Holding it in place in the ‘box, slide down the new bearing and gently tap it onto its shaft with the wooden end of your hammer. The bearing will fit quite easily into its hole in the casting. NOTE your new bearing must have a circlip around its outer edge to locate it, fit it the right way round with the big circlip to the rear. Now slide in the first motion shaft from the other, front end having first glued all its roller bearings in with the thick grease. Again this goes in quite easily with the odd tap from a wooden hammer handle. Now the first and third motion shafts should be firm. But this is where there is a nasty mistake to make (**one of two)……MAKE SURE YOU HAVE FITTED THE sliding 3rd-4th gear selector hub the correct way around. Who ever designed this thing hated Humanity with a vengeance, as if you fit it the wrong way around, the gearbox will seem assemble OK until you fit the bell housing. You will not be able to select third gear as the ‘boss’ inside 27 will bind up against the sliding hub. You might not even be able to bolt up the bell housing properly. The flat side of 27 goes to the rear (the other way the ‘boss’ inside jams up against the 3rd gear).Look at the diagram on page E3
Now slide in the lay-shaft shaft, you will need to lift the lay-shaft to do this, but if you turn the gearbox upside-down, it will drop into place ready for the shaft to be passed through. Take care you fit that shaft the right way round as it has a hole one end for its locating locking bolt to engage in. If you put the shaft in from the rear end, you can line up the holes for that bolt easier. If you unfortunately pick up a roller bearing as the shaft is passed through the lay-shaft, it is easy to pop it back in again with a little finger once you have decided from which end it came! You only need to withdraw the shaft enough either way to replace the errant roller.
 |
Now at the rear end slide on the speedometer drive gear on the shaft(112), its plain flange bit goes up against the new bearing. Fit the long spacer (46) but BEFORE you fit the rear extension bearing, slide those shims (24-25) you removed first down onto the bearing, sticking them to it with thick grease. Now fit the rear-most bearing (108) and its washer (109). If you have a new felt washer (110) fit it next. Fit the new gasket after oiling all the faces, slide the rear casting (106) on and bolt up the two castings together, remembering there are two nuts inside it. Use spring locking washers on all of them. Now put the prop-shaft flange (122) onto its splines, the washer (123) and nut (124). Using something to hold the flange still, tighten up the nut and fit a split pin. Fit the speedometer pinion (113) oiling its shaft. Wire-lock the two screws. A gasket is needed if you go by the manual, but I just put a bit of silicon gasket-goo on the faces.
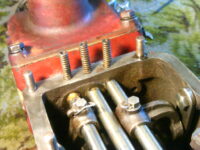
Now re-fit the selectors and rods from the rear end one at a time, hopefully you kept these all together loosely assembled so as to remind you where everything went. Put the two ‘locking’ ball bearings that go between the rods (in the casting) with thick grease to hold them in place BEFORE you fit the rods using a screw driver with a bit of grease on it. The centre rod has a little rounded-ended roller (75) in it to join up the balls actions. Check it has not fallen out (it should be riveted in place). The little locking bolts ( 66,64,83,86×2,69,71,73,) need wire locking though I had to re-tap a thread in one as it was stripped then file a bolt to fit. I used an Allen screw. Ensure those bolts do engage in the holes in the shafts, use a nail to line them both up before screwing in the bolt. Once you have assembled the selector rods, fit the gear lever and try it out. If not you cannot select 3rd gear the sliding hub is the wrong way round. The other (** two of two) catch is if the 1/2” distance tube (77) is missing from the end of the 3rd-4th selector rod (74) ( it was missing on the gearbox I chose to rebuild, luckily my ‘spares’ box had one). If it is missing the sliding bit carries on too far when you select top gear, and those six ball-bearings you so carefully fitted to that sliding hub earlier will all fly out. The cure I’m afraid is to strip it all down and start again!! If it is all OK on your checks of selecting the right gears put the three ball bearings (98-99) into the three holes along with their springs, fit the new gasket then bolt on the lid. Clean out the muck in the drain plug and refit it with a new crush washer.
 |
 |
Fit the seal (19) to the bell housing, put some tape over the first-motion shaft splines to stop any damage to that seal, fit a new gasket, oil it, slide the bell housing on and bolt it up. (From the MG Octagon CC you will get a leather type seal (19), from Moss a neoprene type seal. The leather one is OK for the YA 7/8” dia. shaft, but not the thicker 1” dia. YB shaft. Use a Moss one on the YB. Both seals are 7/8” internally, but the leather one does not like passing over the 1” splines even when taped. It ‘remembers’ the bigger diameter so leaks. The neoprene one springs back easily.) You MUST use plain washers under the spring washers here or the spring washers act as tool-bits and chew out the holes in the soft alloy. Fit the clutch release bearing with its little end spring-clips. Paint the gearbox after you have but a pint of oil in it (no more until you have fitted it to the car). Fit the filler plug having first cleaned out the two breather holes (with a tiny drill bit and blow from the ‘inside’) and the dip-stick.
 |
 |
Having double-checked you have all four gears and reverse, fit the gearbox to the engine. Again two people are ideal for this as it is heavy. Enter the nose of the first-motion shaft into the clutch, ensuring both engine and gearbox are lined up. DO NOT FORCE ANYTHING and certainly do not try to pull the two together with the bell housing bolts as you will crack the thin alloy casting. Quite a bit of wriggling will be needed, then it will suddenly slid together with assistance from both of your feet. Take care about jacking the engine too high, you may want a cup of tea half-way through struggling with the gearbox; it often just slides into the clutch after a cup of tea and a rest!! Before refitting the bell housing bolts, lift the gearbox and slide in the rear rubber mountings (the right way up) and engage the eye-bolt (125) into its hole in the chassis (again very fiddly). Fit the rubber collar (129) and its washer (130). Though on page E4 this needs a split pin I cheat and use a BSF stiff-nut (131), much easier than struggling with a tiny split-pin. Reconnect the speedo cable, the earth lead, the reversing light switch, the prop-shaft, the clutch rod. From underneath the rear of the gearbox, fit that stiff-nut to the eye-bolt( 125-126), do not forget this or your gearbox will leap about over sleeping policemen and pot-holes. Check the reversing light works, you will need the sidelights/ignition on to do this. Remember that the four holes on the prop-shaft flange (122) are not equidistant, they are in ‘pairs’. You will need to spin a rear wheel again to get access to all four; double check they are all tight, the nuts go on the gearbox side.
Re-fit the floors, seats, carpets and before the gearbox metal cover top up its oil (EP90), then take it out for a test run.