
QUESTION:-
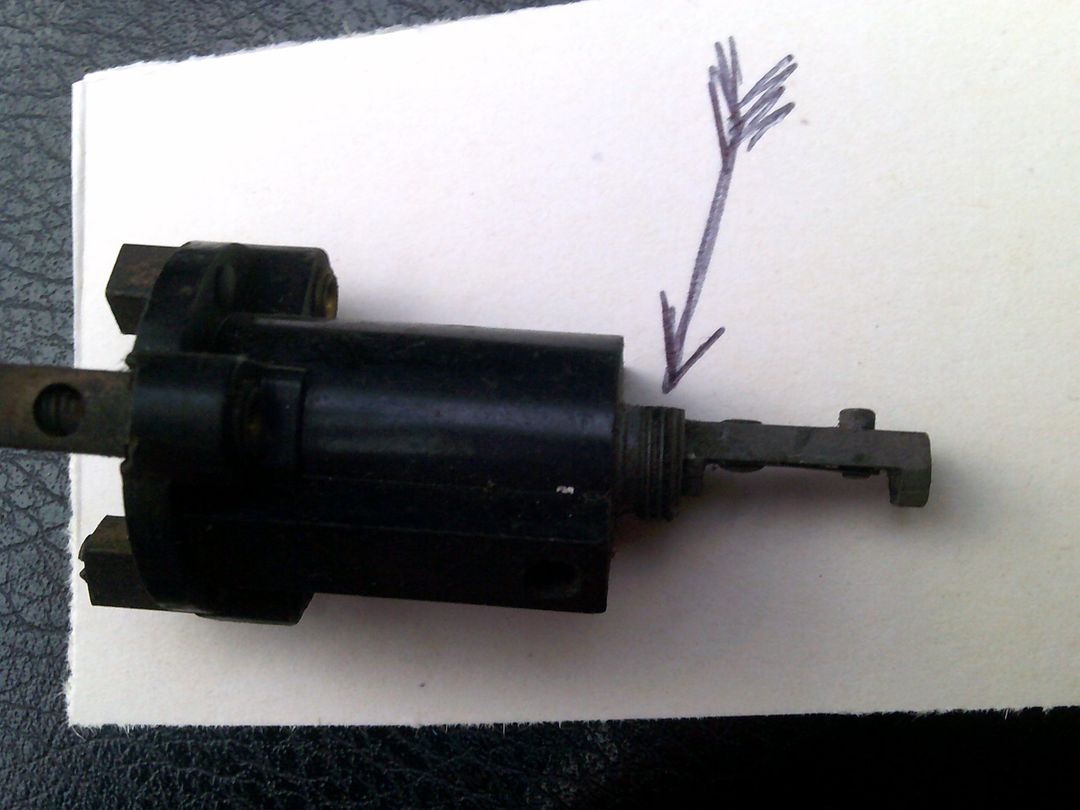
My starter motor has stopped working. It has been struggling for a while. I have tested the battery and solenoid which are all ok and power is getting to the starter motor. I have now removed it and suspect that the brushes may be very worn. Is brush replacement something for the amateur or should I just bite the bullet and get a replacement motor which are about £90 from NTG which is not a huge amount. The workshop manual says the job involves dismantling the motor and should be given to a Lucas dealer!
Its easiest to exchange the motor as your current one probably needs reconditioning. Make sure you note the number of teeth on the bendix as some are 9 teeth others 10 teeth, depending upon which flywheel you have. Make sure you tell NTG though it is possible to swap the bendix over. You will need to remove the exhaust to get the motor out.
Have you any general advice about batteries for a YB please, regarding amp-hours capacity and cold crank amps? My car is fitted with an alternator, and the physical size of the battery is limited by the width (mainlyl) of the battery box. The current battery (fitted by the previous owner) is 72 amp-hours with a cold crank rating of 590 amps. Replacement batteries with these ratings are often a bit too big for the box. Is such a strong battery really needed for a 1250cc XPAG?
ANSWER:-
Wow, that battery would start a V8 diesel lorry engine! I’ve been using a Halfords HB038 12v, 35AH with 330 starting amps. The current one was fitted in 2019 and cost £52. It is half the size of your current one. As you have an alternator, your battery will last much longer than mine with an original dynamo. These HB038 have a 3 year warranty but I get nearly 6 years out of them. The HB038 is the one for the BMC Mini or 1275cc, not very different to ouir 1250cc. Modern lead-acid batteries are much better than those of 1952, you may need to adjust your threaded rods that hold it in the battery box.

QUESTION;-
Which Battery for a Y Type
I need a battery for my YB, what type please?
ANSWER;-
Off to Halfords and buy the one for the 1275cc Mini, the old Austin-Rover Mini. It fits the battery box and is the right amperage, usually about £40-45. You need to slip the bonnet off to fit it but only undo the hinge point on the radiator, lift and slide it forward (put old blankets under the sides and have a second person to assist).
QUESTION;-
Sluggish Traffic Indicators
I was wondering if you could help me. The traffic indicator on the driver’s side of my YB is lazy and will not come out without manual help.
Do you know of anyone , who can repair it or supply a new or re-conditioned indicator?
ANSWER;-
They are simple solenoids, you can service them yourself. Remove the trim panel from the door post, undo the two screws that hold on the unit and disconnect the feed wire. Clean the tiny set of points carefully, clean the bulb contacts inside the amber plastic lens (remove very carefully, they break easily, held on by a tiny screw one end.) Clean the bullet connector both on the end of the wire and the solenoid. Using your battery test them, they should snap open and closed easily. Refit them. Now get UNDER the car, go to where the chassis is opposite that door post, and on the INSIDE of it, hidden up under the floor under the driver’s seat, are three wires with Lucas bullet connectors. All three corroded badly and cause a huge resistance, making the semaphores very slow to operate. One wire is for the interior light, the other two the indicators. You may need to cut off the old bullet connectors and re-solder on new ones. (I had to re-wire mine from here to the selector switch, so bad was the condition of the wires.) When re-fitting ensure they get a good metal to metal earth.
QUESTION;-
Windscreen wiper motor cut out
My technical problem is that the windscreen motor now runs continuously when ignition is switched on. Would you be able to advise is there a simple way of getting the motor to cut out, when not required, but not in a permanent way and so that the dash control knobs would still be able to pick up when required.
ANSWER;-
Remove the wood trim from around the windscreen, once you have lifted the bottom ledge away you will se that the driver’s side wiper knob has a mechanical micro-switch. It is obviously contacting all the time. It can be fixed by simply bending (carefully) one contact away a bit so it dis-connects.
QUESTION;-
Sluggish Starter Motor
For some time the starter motor has been very sluggish….a very slow er er er er….then the starter turns the engine quickly and the old girl starts.
Only happens when the car has not ben started for a few days. Once the car has started then re-starting is not a problem.
I have a charge/discharge battery conditioner which I use when the car is in the garage.
The battery is OK.
Have bought a new set of brushes from the Octagon Car Club but I have yet to get them fitted.
Any ideas please.
Could it be the brushes
Do I need a new starter motor
Could it be the solenoid.
Would welcome any ideas.
ANSWER;-
I had this last year!!! I bought a new battery but it made no difference. It turned out to be burnt contacts inside the solenoid and a worn-out starter motor. A new one was only £50 (Peter has the supplier’s address). New brushes in the starter might work, but as you need to remove the manifold to get it out, I’d fit a new one.
QUESTION;-
Steering Column Slip Ring
My slip-ring does not work on the steering column.
ANSWER;-
You can ‘reclaim’ the slip ring by turning the bakelite sleeve one-third round the column. It has three little screws securing it to the shaft. By moving it round ‘one screw’ you present the brushes with an unworn bit of the slip-ring. You can only do this twice (once every 50 years…). A good dowsing of WD40 up inside the slip ring sleeve whilst moving the steering wheel cleans it up a bit.
QUESTION
Faulty Condenser
I am at my wits end!
Have you ever heard of a duff battery causing serious rough running please? Today I have realised that my battery is nearly 8 years old and appears to be unable to retain much charge. However, it started the car OK this morning – as ever – but for some reason although it runs it’s as if it needs to clear its throat. Despite all I have tried nothing has made any difference. I will get a new battery tomorrow, but am I clutching at straws?
ANSWER;-
A lot of cheap Chinese condensers are useless, they are about £1.50 each and fail within weeks. I use MINIsport’s £8 condenser, guaranteed to work. Try running a wire from the battery direct to the coil ‘live’, then start the car (you are ‘hot-wiring’ it). If it runs OK its between the battery and the coil. Batteries can hold 12-14v even when worn out, but as soon as you apply heavy current use, they drop to about 6-8v.
From the happy Y owner….. You were spot on! At 19.45 tonight I finally got around to swapping the nearly new condenser on my Moss replacement points kit with another one bought from Moss last week. She fired up and ran immediately. The auto electrician that came today did not think it could have been the condenser, so I shall let him know a thing or two! I wanted him to test all three that I have and I should have stuck to my guns! Now all I have to do is to tune it up from the basic settings that I have returned it to so that I could eliminate some unknowns. I also have 25 litres of unleaded to decide what to do with. There was nothing wrong with the fuel as the 15 new litres I put in after draining still didn’t allow it to run properly!
Sincere apologies for troubling you, but I can’t thank you enough. I was at the end of my tether!
QUESTION
Spot/Fog Lamps
I am buying a pair of spot/fog lamps for my brother’s YT. Can you tell me the correct size as I have found both 5.75″ and 7″?
ANSWER
The fog lamp supplied with the Y type was the Lucas FT 57 and the diameter of the glass lens was just over 6 inches, The repro lights I have fitted on my YT are from SVC ltd https://www.s-v-c.co.uk/…/5-34-free-standing-stainless-steel… These are 5 ¾ inch lenses and have the medallion set in the top as the originals did, 7 inch would look to big. Avoid the more modern looking spots that are slimmer.
QUESTION;-
Brake light switch
Brake lights not working. I’m guessing it’s just needing getting of the switch…. But where is it? I’ve looked all around and inside and outside the pedal box and around the master cylinder. I can’t see anything that that looks like it could be a brake switch.
ANSWER;-
Its a motorcycle type switch with a wire that pulls it, mounted to the rear of the master cylinder. A bit of thick wire connects it to the brake pedal (this is a real sod to see). BUT many people converted to a hydraulic switch mounted either on the master cylinder exit, or under the bonnet/o/s wing where the front brake pipes part.
Neil.
QUESTION;-
Fuses
Thought I would treat the car to some new fuses. The existing are rusted very badly and one of the spares fell apart.
One of the fuses is rated at 35amp. While looking for confirmation of fuse ratings I have learned the following. Early fuses such as these are rated on the value at which they will fail. Modern fuses are rated at their working load. Failure is a 2:1 …Presumably if I replace an old 35amp fuse with a modern one showing the same value I am using a fuse that will potentially tolerate 70 amp before ‘blowing’. Would a modern 20amp do the job? What’s the recommendation.
ANSWER;-
25amp, I actually use the old fuse glass and brass ends, soldering in a 25amp wire. You need to check the holder clips are clean, they get encrusted with verdigris, a tiny roll of emery will do the trick. Put a little Vasaline on the fuse ends and the clips, stops further corrosion. In the past I have been caught rummaging through the bins at MacDonalds for a bit of foil, to get me home wrapped around a blown fuse!!!!
Neil.
QUESTION;-
Horn push button
I am having problemswith the horn assembly the horn works but the button does not, I wonder if anyone has a wire diagram for the horn assembly , I have stripped it down and I think the last owner has had a go at some time. Hope you can help.
ANSWER
The horn works from the slip-rings on the steering column, just under the carburetter. The horn button ‘earths’ a relay that works the actual horns. The most common problem is the slip-ring has worn out, the brass brush is not contacting it. To cure, undo the three screws that hold the bakelite body to the steering column (under the bonnet, under the carb). Turn it one-third then refit the screws. You will have moved the ‘worn’ bit to one side. It should work now. A bit of WD40 squirted up inside the bakelite body might also clean off some of the dirt. I assume you have a YA.
QUESTION;-
Starter motor disengaging problem
I boiled the Tourer on the way back from France last year as you may know, but after it had cooled, the starter motor pinion refused to disengage from the starter ring when I tried to start her, or so it seemed at the time and indeed proved to be the case when I checked it back at home. She wouldn’t fire up as there was hardly any compression so I couldn’t really test whether it would work normally. It had never happened before to my knowledge. I took the starter to a local car electrical repair place and was told that it all appeared to be working OK. The springs were all in place and the pinion ran up and down the volute freely – pushed back by the hair spring presumably. I now have the rebuilt engine back in the car, hooked up the starter today both with and without the plugs in place to see whether it was all OK and lo and behold it is still not disengaging. I can grip and rotate the motor from the pinion end easily at the moment as the ram plate etc are all out of the car, and the pinion then disengages as it should. I can leave the end cap off so that I can do that more easily once it is refitted – I gather although I have never had to do it ever! The actual ring gear on the flywheel wasn’t replaced and is a bit rough to look at. I have fettled it a bit with a file while it was out of thecar, but as I said it wasn’t ever a problem before. Have you come across a similar problem before please? Would you bolt itall up and assume that it will get itself back to ‘normal’? Should I get the hair spring changed anyway as a precaution? I have a spare 2 bolt starter that I think I have used temporarily before so I could try that. I have read that I can get the starter out by mainly dropping the
exhaust and working it pinion first out of the engine bay, so it wouldn’t be too much of an issue to take a chance, but any thoughts you may have would be appreciated.
ANSWER;-
The starter motor ‘bendix’ ( the geared bit) relies on the engine starting up and the speed of the flywheel going faster that the starter motor. This then flings the little gear back, disengaging the starter. It is (almost) foolproof, but a worn starter ring-gear will grip the gear and not let it disengage. If the motor works OK off the car, it can only be the ring-gear that is causing the problem. The light spring only holds the gear out of the way of the flywheel, it does not ‘return’ the gear; that is done by centrifugal force on the spiral bit inside. Do not lubricate the Bendix as this attracts clutch dust and jams it up. There should be a metal cap on the other end with a square end on the shaft, there for a spanner to assist in freeing a jammed Bendix.
You may well require a new ring-gear.
QUESTION;-
Starting problems (condenser)
I own a 1950 YA Saloon which has behaved impeccably for the last 10 years but a few weeks ago she decided to be a little awkward. I drove her out of the garage and left her ticking over for about a quarter of an hour, when I tried to drive off for a “run” she coughed and died. My local garage diagnosed an electrical problem and I have replaced battery, coil, points, condenser, plugs and the lead from the coil to the distributor. None of these things helped the situation, she still ran roughly and died when I depressed the accelerator. Another garage diagnosed it was a carburetor problem and put me in contact with a chap who worked designing carburetors for a lot af his working life. He is convinced that the carburetor is ok and he managed to get the engine to run very roughly enough for me to drive the car into the garage previously
I have had to push her in and out. I am at a bit of a loss on what to do next and would really appreciate some suggestions I would be very grateful for your comments.
ANSWER;-
My first suspicion will be the condenser, even ‘new’ ones these days are rubbish. First, carry out a service again (using your new bits) to ensure you missed nothing. If this fails then double-check the following;-
1) The points gap,(cheap ‘Chinese’ points heels wear away very fast, the bit that bears on the cam,)
2) the distributor cap and rotor arm (they burn away eventually),
3) the wire from the coil to the points for corroded/loose connections,
4) the HT lead from the coil INSIDE the coil connection, its can corrode inside,
5) the connection from the wiring loom to the coil, again corrosion or loose,
6) fit another condenser, you may need to fit a ‘modern’ one…
and the following;-
7) that there is oil in the SU carb damper pot,
8) that the dash-pot piston is not sticking (clean out the insides),
9) that you have NOT fitted carbon plug leads AND suppressor plug caps, (both act as suppressors and reduce the spark),
10)that the rotor arm is not tracking if its a new one from ‘China’, a common problem with their cheap plastic,
11) that your filter on the fuel pump is not full of fine rust particles from the tank,
12) that your petrol tank has not ‘absorbed’ water with this ethanol in petrol (there will be some water in the bottom of the float chamber…..)
13) that there is no obstruction of the needle and jet in the carb,
14) that your coil is not life-expired (they last for donkey’s years) giving a weak spark,
15) that your ignition switch is not worn inside on its brass contacts giving a high-resistance,
16) some people have experienced problems with supermarket fuel, its OK in fuel injected cars but may not vapourise as well in a carb one suspects.
I have to say it sounds like ignition to me and that condenser.