
Still patiently awaiting the arrival of the pistons so that I can take the block to be rebored. A piston is required as it has to be measured at 90 degrees from the gudgeon pin just under the oil control ring grove. This is the widest part of the piston when cold, and pistons are not made round but turned slightly oval and tapered. This is so that once they reach their working temperature, they have expanded to more or less the same diameter all over. According to the data in the workshop manual, the pistons run with a 0.0021” clearance, plus or minus 0.0005”. Should you need to do as I have done, that is supply the necessary data and measurements for the reconditioner to work to, I’ve copied the pages to this article. A book that you should never be without is that by Philip H. Smith, ‘Tuning and Maintenance of MGs’ available from the Octagon Car Club.
This book may have been written back in 1952 but it is very relevant to our engines. My copy is a reprint from 1956 I found in the late 1960s. I used it then for the cheap Wolseley 4/44 cars I ran on shoe strings.
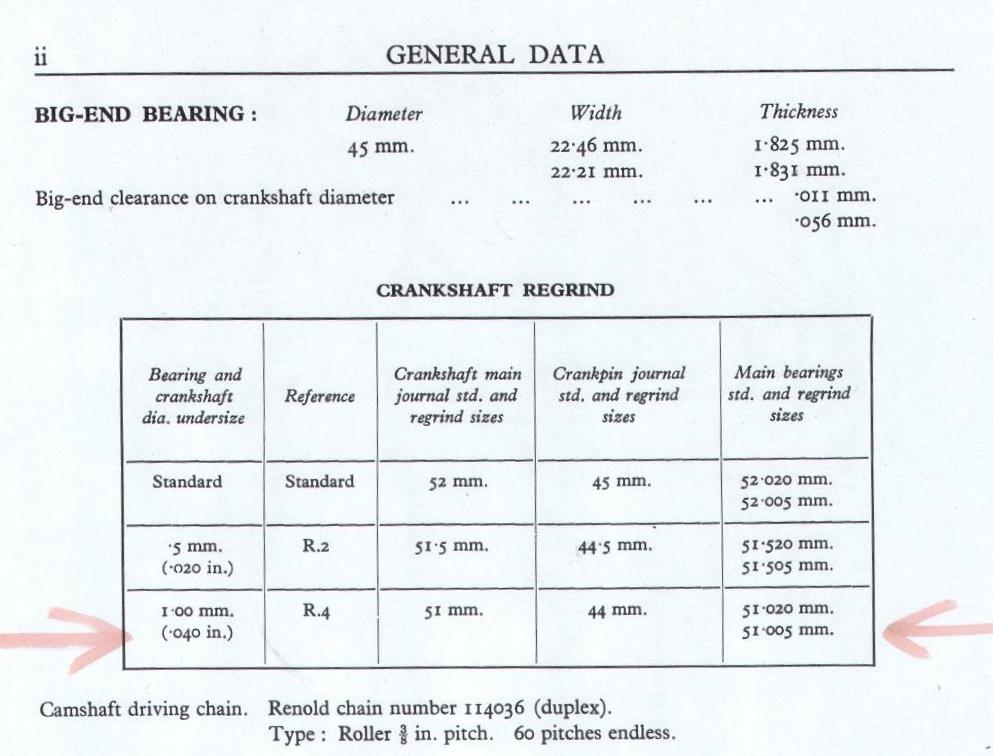

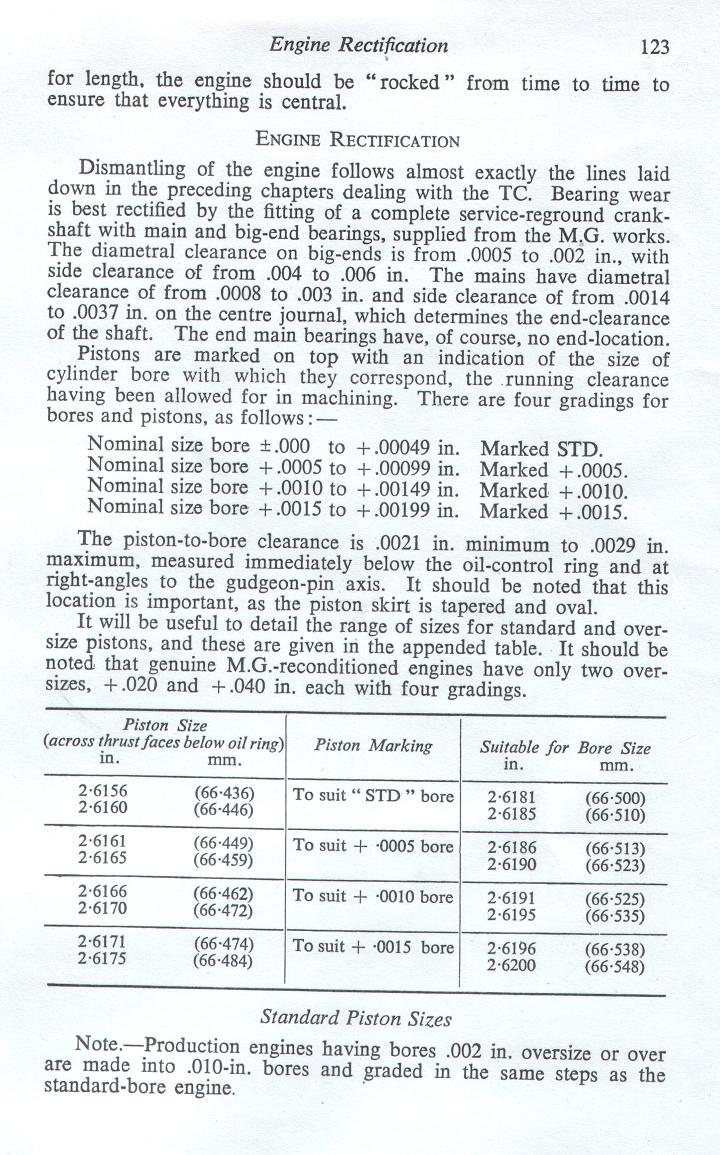
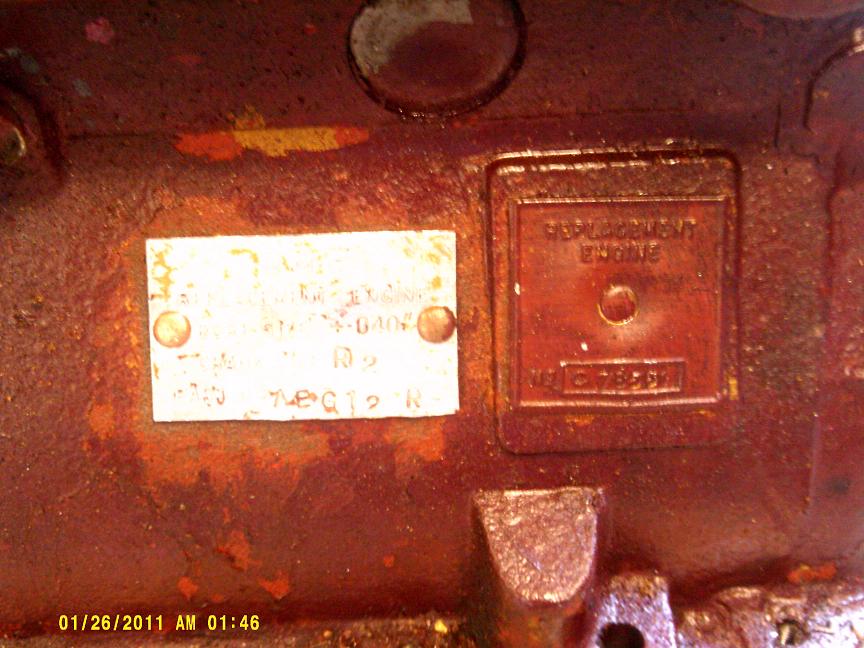 If your engine is a reconditioned one, it will carry an aluminium plate next to the engine number plate. This gives the state of the engine when it was fitted as an exchange reconditioned unit. But beware, someone may well have further ground the crankshaft or rebored it more. The only positive way is to read the top of the piston for its oversize. This is stamped into the crown as ‘0.020’ or ‘0.040’; or just ’20’ or ’40’. Also, to look at the back of the bearing shells of the crankshaft, again for the undersize as ‘R2’ or ‘R4’.
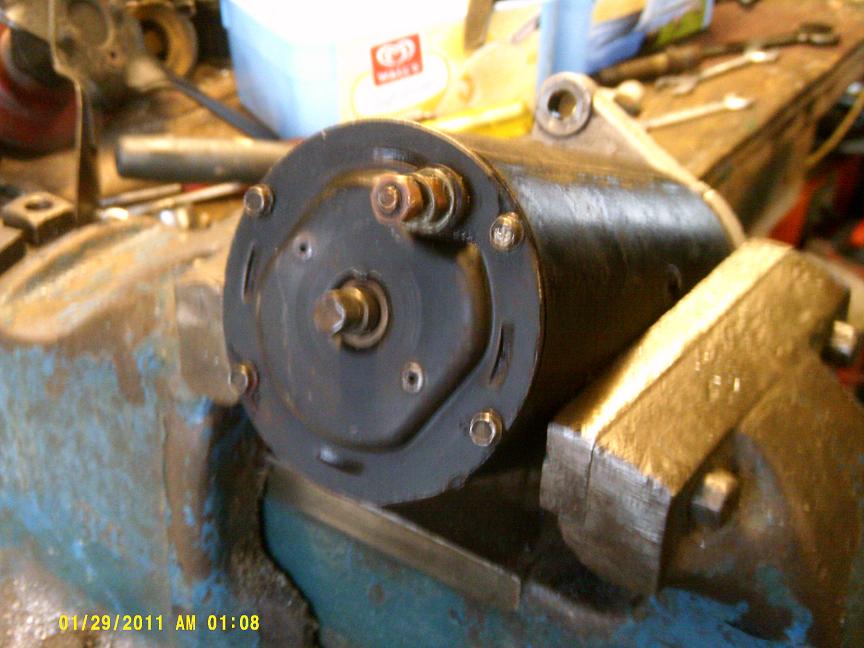
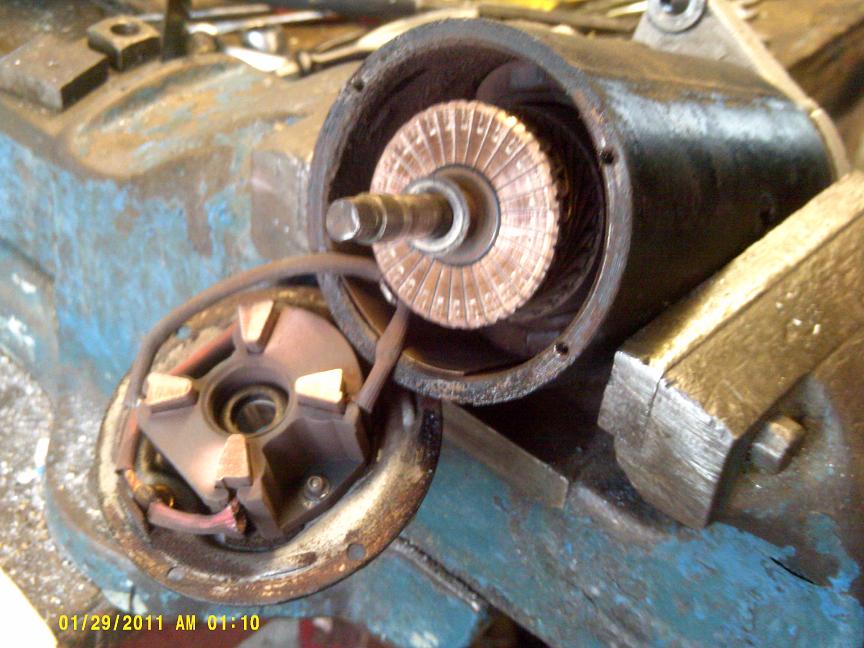 It was time to start the checking of the ancillaries of the engine. The starter motor was first, and removing it’s end plate to check the condition of the brushes proved to be easy. The insides were all OK, and a bit of a clean, oil the bearings, and so I refit the cover. Now, the really keen MG owners will have spotted that the starter motor is not the usual YB one. (See photo’s Left & Right) That is because it is a Morris 1000 one, also seen on Austin A30, A35, A40 Farina and early MG Midgets and Minis. If you try to fit one yourself, you will need to counter sink one of the screw heads into the alloy end plate that bolts to the bell housing. Otherwise the screw hits the casting of the bell housing. Morris 1000 starter motors are much cheaper and easier to get hold of, but remember they only fit the two-bolt-hole engines (many earlier XPAG use a three bolt fixing starter motor).
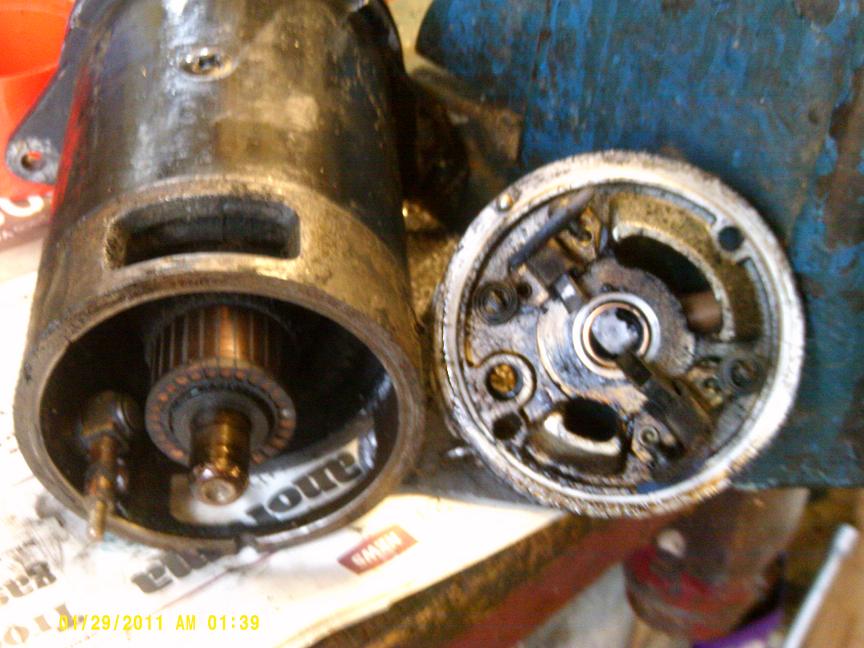 Next it was the dynamo’s turn. This is an original YB one with the brass oiling plug at the brush end. Inside it was a real mess, all oily and grubby. Worse, there was solder splattered on the body from an overheated commutator. Luckily I have a spare dynamo from a later BMC car, but will need a fan belt pulley with the cooling fan with it. Luckily the one from the original dynamo fitted this much later one. This is not the case with the YA/YT dynamo, it has a thicker shaft and has a posh ‘alloy pulley and fan.
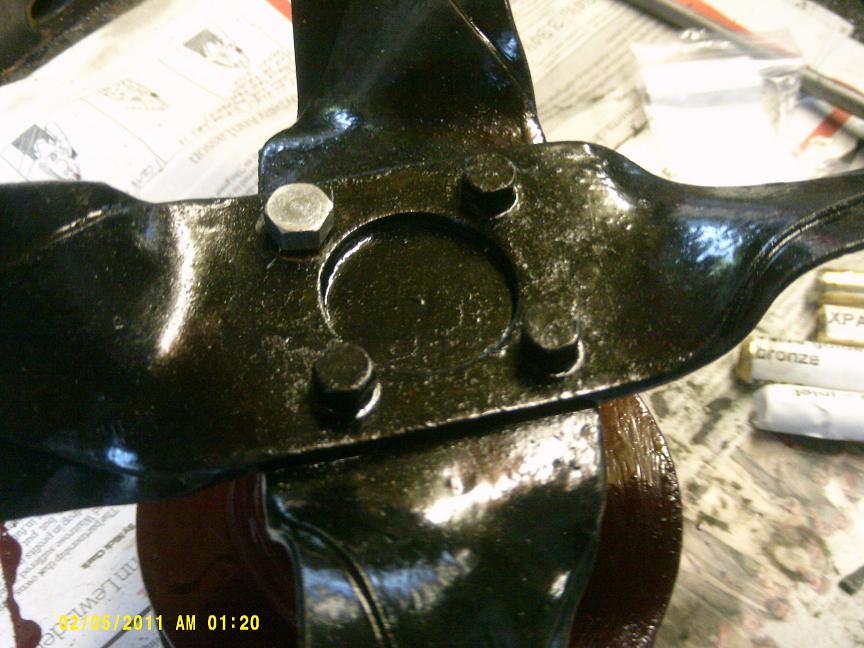
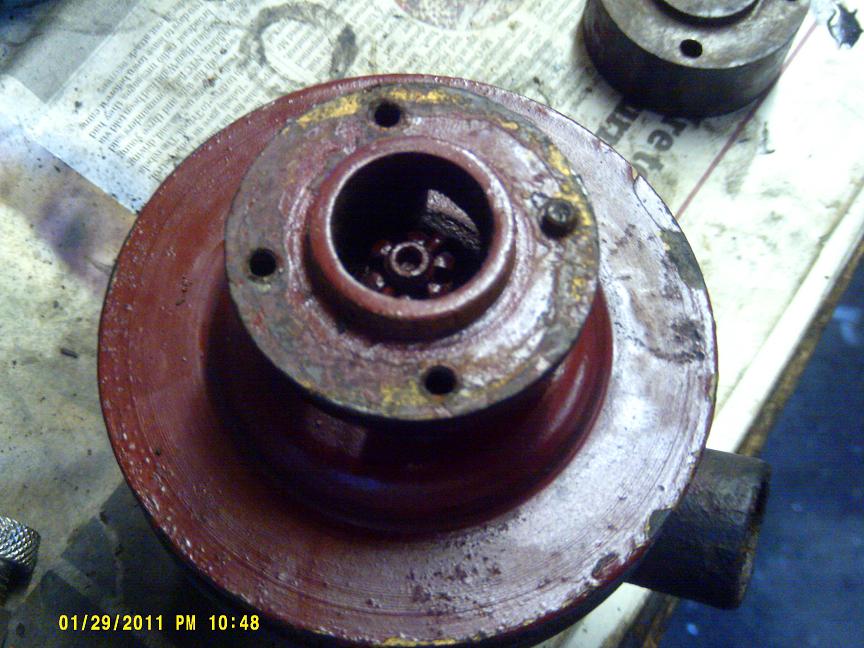 Then I took the water pump to bits, and found one of the four long thin bolts that hold the fan to its pulley was sheared off! Luckily I have ordered some new one’s anyway. I cleaned out loads of thick grease from inside the pulley, where the grease has oozed out from the bearings. Note this is an engine with a grease nipple on its water pump! Later one’s did without.
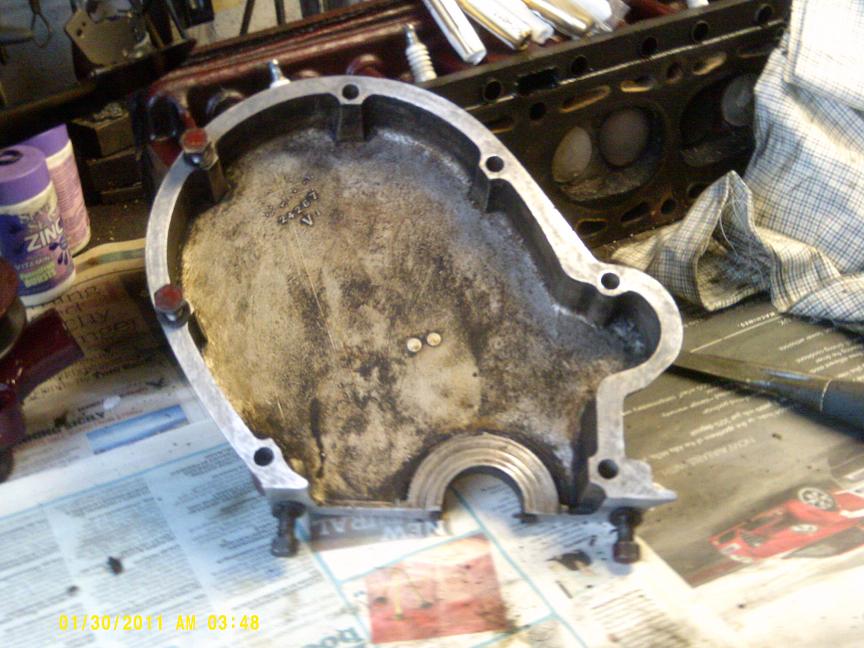 Then I cleaned up the timing chain cover. ( Photo on Left) It is vital that all gasket surfaces are spotless if you are to finish up with a leak-free engine, and an oil tight one. Note that I screw the relevant bolt into their hole for storage so as not to lose them.
I hunted through the old ice-cream boxes I was using to store all those little items one removes and found the front engine stabiliser rod.
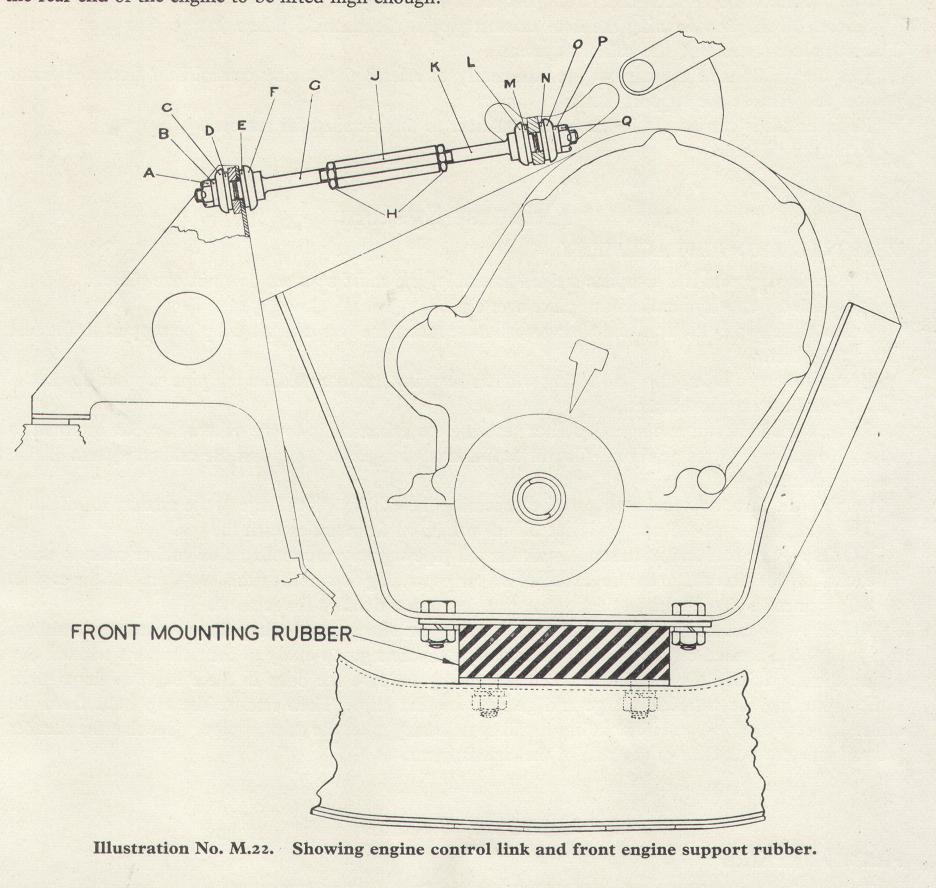 This I cleaned up and added four rubber cones to the ‘new bits’ required. This rod is actually a turnbuckle, (those of you who do your own bi-plane wing rigging will recognise that word, or if younger the method of adjusting cable controls on piston engined aircraft…) It has a left hand and right hand thread at each end of the centre hexagonal bar. If you turn it one way it extends, the other it shortens.
 Photo of Stabiliser/Steady Bar below left and drawing right.
Once fitted in situ on the car, it should be adjusted to not pull or push the engine either way; ie un-stressed. One end bolts to the stabiliser bracket on the off-side front above the suspension damper (to which it bolts). The other end fixes to a little bracket underneath the water pump. If the bracket breaks, the end of the rod rams its way through the side of the water pump, bit by bit, un-noticed, until you suddenly loose all your coolant. Something that needs checking from time to time.
 Finally on this day I relined the clutch plate. Yes, I still re-line my clutches with new facings and rivets. You can get them from Lancaster Auto Parts, as advertised in Old Motor; much cheaper than buying a new one! Again checking the release bearing for wear now is a good idea, if the carbon facing is only about 2mm from the holder, fit a new one. Mine was OK with loads of life left. I also cleaned and greased the clutch cable on the car with graphite grease.
Neil Cairns.